You can create multiple user accounts at one time by entering the user information into a LaunchPad-provided Microsoft Excel template and then importing that file into LaunchPad.
Important: Bulk import files should be created on a per-client basis, that is, create separate bulk import files for different clients or sub-clients.
Creating user accounts in bulk is done in three steps:
-
Download the Microsoft Excel template from LaunchPad
- On the Administration > Users page, click Import Users.
The Import Users window opens.
- Click the Bulk User Creation Template link.
You are prompted to download the template and save it locally. You can save the file with any name.
- Once the template is saved, open it and, if prompted, enable editing.
The template contains three sheets:
- Data
- This is the sheet used to bulk import user information to LaunchPad. Its columns match the LaunchPad user account fields. Data for two users is populated as an example for reference.
Important: The import will fail if you rename the Data sheet or if you rename, delete or change the order of columns in the Data sheet.
- Data Restrictions
- This reference sheet explains which columns of the Data sheet are mandatory and which columns have restrictions on the type of data you can enter.
- Valid Metadata
- This reference sheet lists the valid country code abbreviations, job role and LaunchPad role options for those columns of the Data sheet.
- On the Administration > Users page, click Import Users.
-
Add user account information to the Data sheet of the template
- At a minimum, you must enter data into the required columns for each user. The non-required columns can be left empty, but should not be renamed, moved or deleted.
Note: You can delete the two example user rows.
- Save the completed template in an accessible location.
- At a minimum, you must enter data into the required columns for each user. The non-required columns can be left empty, but should not be renamed, moved or deleted.
-
Import the Excel file to LaunchPad
- On the Administration > Users page, click Import Users.
The Import Users window opens.
- Click Choose File.
- Browse to the location where you saved the completed template, select the file and click Open.
- Click Upload to start the import process.
- On the Administration > Users page, click Import Users.
LaunchPad will accept the file if it satisfies the import validations. You receive system update notifications as the bulk import runs. Once the import completes, you are prompted to refresh your browser to see the new users in LaunchPad.
Note: An import that contains many users who are being assigned a LaunchPad Client Administrator account will take longer to run.
- Successful import
- The new users display on the Users page.
- Failed import
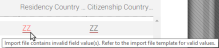
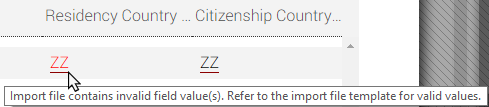
- An error message displays. If the failure was due to content in the import file, the Data sheet displays in the Import Users window. Hover your mouse over any underlined entries to see a tooltip with more specific information on the error. Fix all errors within the original import file and try the import again.
Sample error information