Bulk Conversion
- CORE Administrator
- All
- Case Manager
To create a bulk conversion job:
- On the Analysis page, filter to and then select the documents to be converted in the Results list.
- In the toolbar of the Results list panel, select .
- Select a conversion reason in the Convert/Reconvert Documents window:
- Near Natives
- Prepares documents for:
- Viewing in Near Native view
- Bulk printing of Near Native view
- Redactions & Production > Limited
- Prepares documents for:
- Production
- Global redaction
- Bulk printing of Image view (when a document has an image)
- Bulk printing of Redaction view
- Redactions & Production > All
- The same result as Redactions & Productions > Limited, but also prepares documents for:
- Viewing in Image view (when a document has an image)
- Viewing in Redaction view
Note: To convert documents for both the Near Natives and Redaction & Production settings, run the bulk conversion wizard twice, once for each setting selection.
- If you selected Near Natives or Redactions & Productions > All, specify which MIME types you want to convert:
- Highly recommended MIME types (MS Excel, MS PowerPoint and MS Project)
- Recommended MIME types (MS Word, MS Excel, MS PowerPoint and MS Project)
- All MIME
types
Note: All MIME types includes documents without a detected MIME type and those of type Unknown.
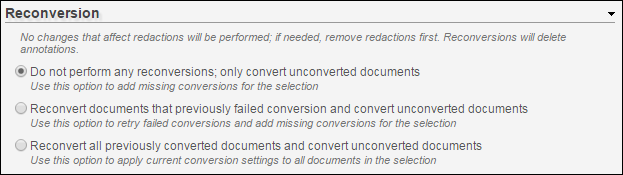
- In the Reconversion area, select Do not perform any reconversions; only convert unconverted documents. If you specifically selected documents that you wish to reconvert, select one of the appropriate remaining options.
- Specify a Job Name and optional description for the conversion job.
Tip: This name is used on the Jobs page and for the Job Processing Smart Filter.
- Click the Convert button to start the conversion job.
- To monitor the status of the job, navigate to the page.